반응형
php ajax bootstrap datepicker 예제
#화면

#index.php
<?php
$connect = mysqli_connect("localhost" ,"root", "eorn1145","open");
$query = "SELECT * FROM tbl_order ORDER BY order_id desc";
$result = mysqli_query($connect,$query);
?>
<!DOCTYPE html>
<html>
<head>
<title>부트스트랩 달력예제</title>
<script src="https://ajax.googleapis.com/ajax/libs/jquery/3.1.0/jquery.min.js"></script>
<link rel="stylesheet" href="https://maxcdn.bootstrapcdn.com/bootstrap/3.3.6/css/bootstrap.min.css" />
<script src="http://code.jquery.com/ui/1.10.3/jquery-ui.js"></script>
<link rel="stylesheet" href="http://code.jquery.com/ui/1.11.4/themes/smoothness/jquery-ui.css">
</head>
<body>
<!-- 달력 선택 부분 -->
<div class="container" style="width:900px;">
<h2 align="center">부트스트랩 달력예제</h2>
<h3 align="center">주문 날짜</h3>
<div class="col-md-3">
<input type="text" name="from_date" id="from_date" class="form-control" placeholder="from date" />
</div>
<div class="col-md-3">
<input type="text" name="to_date" id="to_date" class="form-control" placeholder="to date" />
</div>
<div class="col-md-5">
<input type="button" name="filter" id="filter" class="btn btn-info" value="필터" />
</div>
<!-- 달력 선택 부분 끝-->
<div style="clear:both"></div>
</br>
<!-- 데이터 출력 부분-->
<div id="order_table">
<table class="table table-bordered">
<tr>
<th width="5%">번호</th>
<th width="40%">이름</th>
<th width="43%">아이템</th>
<th width="10%">value</th>
<th width="12%">주문일</th>
</tr>
<?php
while($row = mysqli_fetch_array($result))
{
?>
<tr>
<td> <?php echo $row["order_id"];?> </td>
<td> <?php echo $row["order_customer_name"];?> </td>
<td> <?php echo $row["order_item"];?> </td>
<td> <?php echo $row["order_value"];?> </td>
<td> <?php echo $row["order_date"];?> </td>
</tr>
<?php
}
?>
</table>
</div>
</div>
</body>
</html>
<script>
//달력 날짜 출력 설정
$.datepicker.setDefaults({
dateFormat:'yy-mm-dd'
});
//부트스트랩 달력 기능
$(function(){
$("#from_date").datepicker();
$("#to_date").datepicker();
});
//필터 버튼 클릭했을 때
$('#filter').click(function(){
//날짜 input text 창에서 값을 가져온다.
var from_date = $('#from_date').val();
var to_date = $('#to_date').val();
//빈칸이 없으면
if(from_date != '' && to_date != '')
{
$.ajax({
url:"filter.php",
method:"POST",
data:{from_date:from_date,to_date:to_date},
success:function(data){
$('#order_table').html(data);
}
});
}else
{
alert("날짜를 선택해 주세요");
}
});
</script>
#filter.php
<?php
// 찾을 날짜 데이터를 넣어 준다.
if(isset($_POST["from_date"], $_POST["to_date"]))
{
$connect = mysqli_connect("localhost","root","암호","db이름");
$output = '';
//쿼리
$query = "
SELECT * FROM tbl_order
WHERE order_date BETWEEN '".$_POST["from_date"]."' AND '".$_POST["to_date"]."'";
//실행
$result = mysqli_query($connect , $query);
//출력 데이터
$output .= '
<table class="table table-bordered">
<tr>
<th width="5%">번호</th>
<th width="40%">이름</th>
<th width="43%">아이템</th>
<th width="10%">value</th>
<th width="12%">주문일</th>
</tr>
';
if(mysqli_num_rows($result)>0)
{
while($row = mysqli_fetch_array($result))
{
$output .= '
<tr>
<td> '.$row["order_id"].'</td>
<td> '.$row["order_customer_name"].'</td>
<td> '.$row["order_item"].'</td>
<td> '.$row["order_value"].'</td>
<td> '.$row["order_date"].'</td>
</tr>
';
}
}else
{
$output .= '
<tr>
<td colspan="5">데이터가 없습니다.</td>
</tr>
';
}
$output .= '</table>';
echo $output;
}
?>
반응형
'PHP 박살내기 > php ajax json' 카테고리의 다른 글
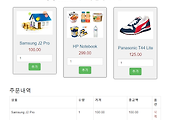
| php session을 이용한 간단한 쇼핑 장바구니 구현 (1) | 2017.09.22 |
|---|---|
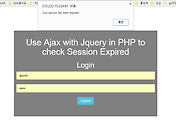
| php login session 예제 (1) | 2017.09.21 |
| php 좋아요 기능& 알림기능 구현 3 (좋아요 부분) (0) | 2017.09.20 |
| php 좋아요 기능& 알림기능 구현 2 (좋아요 총개수 불러오기& 글 삽입 기능) (1) | 2017.09.19 |
| php 좋아요 기능& 알림기능 구현 1 (로그인 부분) (0) | 2017.09.19 |

댓글